When I first learned to knit, I did not know that there are multiple levels to finishing a knitting project. I was under the impression that you simply pick up any pair of knitting needles, any yarn that suits your fancy, knit the item, and then remove it from your needles when it is the desired length. It turns out that there is much more research and work that goes into any knitting project.
The Pattern
The first step is to pick a pattern for your project. Not only will you search the knitting websites and books, but you will also research the type of yarn and type of needles and the techniques required of the pattern you will eventually choose. The pattern will include a picture of the finished product, the stitches for each row, the suggested yarn weight and needle size, and the amount of yarn skeins required to finish the project.
There is usually an explanation of the stitches and the abbreviations used in the pattern. This gives you an idea about the level of difficulty: do I understand how to create the stitches mentioned? Many people, including myself, will create what is called a swatch. This is a few repeats of the pattern on a small scale just so you can: practice the technique to create the stitches, test the yarn, and test what is called the gauge. The gauge is how many stitches per inch and is an indicator if your yarn tension is too tight or too loose. Tension will either cause your stitches to be too large with spaces between each stitch or too small causing the stitches to overlap each other. Uneven tension throughout a project can cause uneven stitches; some too tight and some too loose.
I have learned that the suggested yarn weight and needle size of a pattern is important. If you are making a hat, for example, and you decide to use a thicker yarn (heavier weight) and larger needles, your finished project will be many sizes larger and looser than intended.
Knitting Time
Once you have finished your research and selected the pattern, yarn, and needles, you are ready to begin knitting. The fun part! There are various ways to keep track of how many repeats and where you are in the pattern, including apps. I like to use paper and pencil so I can write any tips for myself in the margins.
Some patterns are vague when it comes to techniques. Most patterns start with Cast On X number of stitches. There are in fact many different types of Cast On techniques that will change the appearance of your seam. This is also true of the Cast Off. This means that you will have to research and test, yet again, how the different Cast Ons and Cast Offs look in conjunction with your pattern.
All patterns will have a guide if they use abbreviations in the pattern or techniques by name and not stitch-by-stitch. For example, if a pattern says “Seed stitch for the first 10 rows”, the guide located above the pattern will say “Techniques Used: Seed stitch (knit 1, purl 1 for all rows)”.
Finishing Time
After you have finished the Cast Off and the project is fresh off the knitting needles, there is still more work needed. Now it is time to weave in any yarn ends and to shape the project. Yarn ends are from joining a new skein into the project because you finished the skein or because you are changing colors. You must use a crochet hook or darning needle to weave the yarn ends seamlessly into the project.
I do not enjoy sewing. So it is no surprise that I also do not enjoy weaving in the yarn ends. There are many different techniques to weaving in the ends that vary by the pattern itself and the location. Weaving in end techniques include, but are not exclusive to: seams, borders patterns, color changes, right or wrong sides, and of course the stitches.
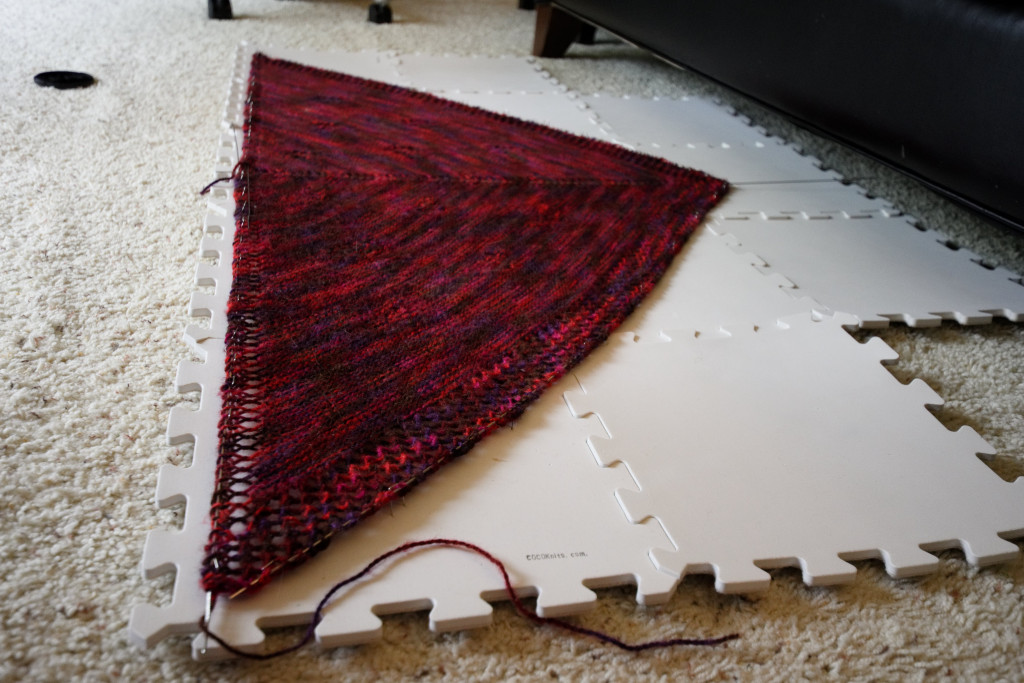
There is one last step before a knitting project is ready to be worn: blocking! Blocking involves shaping the project into its intended shape. Although this may sound simple, it requires research of the yarn itself, the pattern, and the type of knit created. Different yarn fibers interact differently with water, heat, and steam. Depending on the fiber content of the yarn, you will block a knitted item with water and a special soap, steam, or even an iron with a cloth to avoid melting the yarn. The pattern may require that you block a finished knitted item with pins and thin flexible wires or just lay in out. If a pattern has holes, like lace work, you will want to open up the holes so that the pattern is more obvious. If a pattern or the yarn was somewhat stiff while you were knitting, you will want to pin the blocked item so that the fabric relaxes into its intended shape.
Stages of Finishing
The below photo was fresh off my knitting needles. It is a blanket that was knitted from four separate panels. They needed to be sewn together and the remaining ends weaved into the blanket.

I also had to block the blanket so that borders no longer curled into the blanket from the sides.

Below is a photo of a shawl being blocked with pins and thin wires through the borders to create the triangular shape.

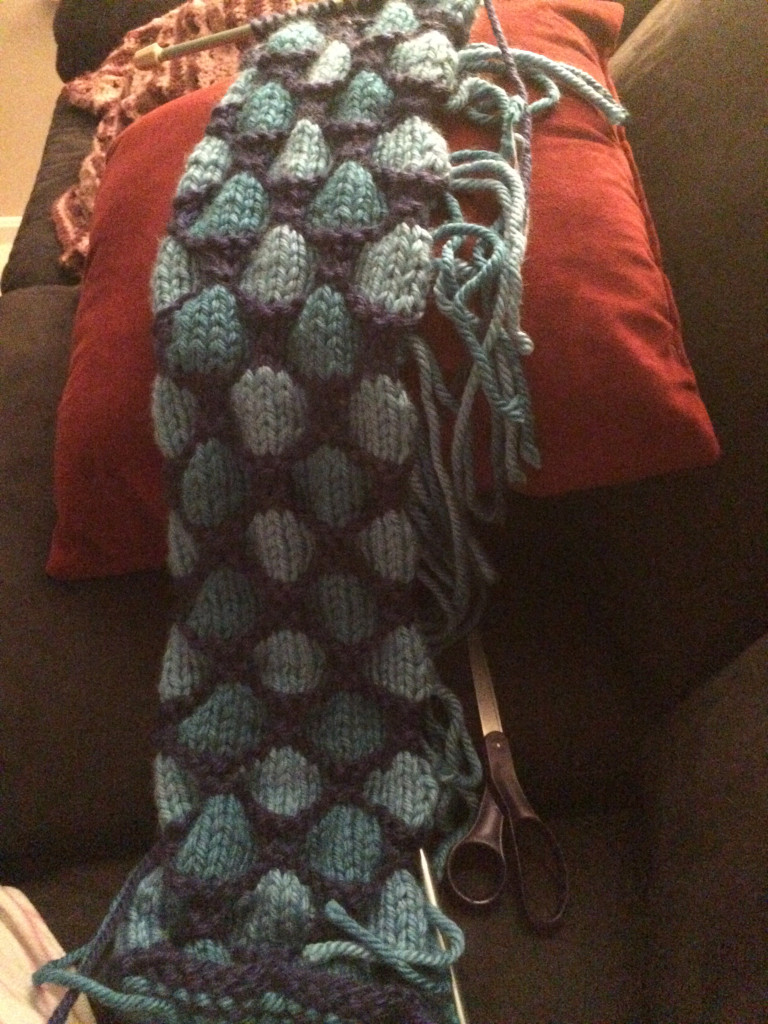
The photo below is of a scarf in progress with three different color yarns. You can see on the right edge all the ends that will have to be weaved into the border seam during the finishing process.


1 Comment
SEO Service
January 24, 2020 8:09 amAwesome post! Keep up the great work! 🙂
Leave a Reply